check

check

check

check
check
check
check
check

check

check
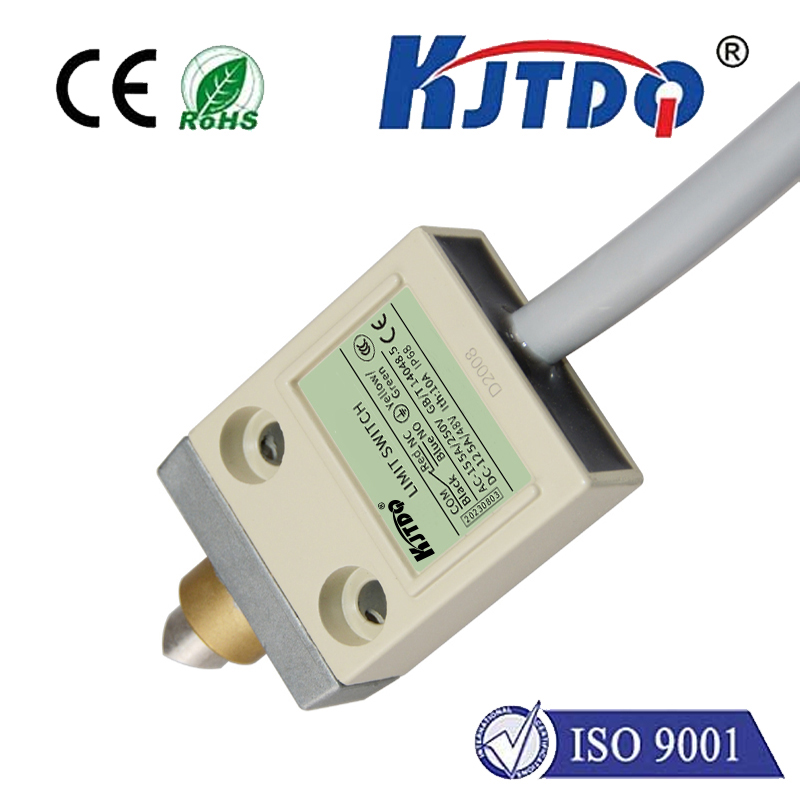
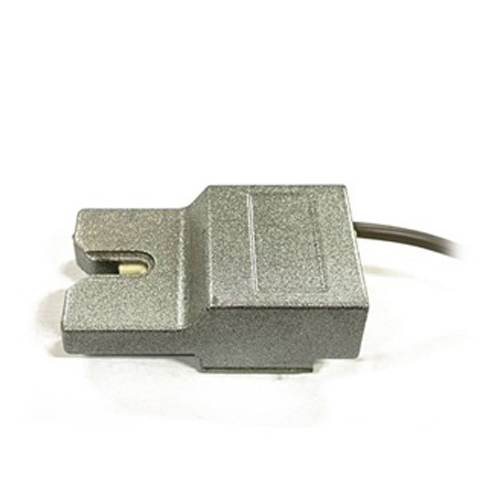
For any enthusiast or professional using the Elegoo Mars 3, understanding the role of the limit switch is crucial for achieving consistent, high-quality 3D prints. This small but vital component acts as the printer's homing sensor, a fundamental part of its calibration and operational accuracy. The limit switch on the Mars 3 is typically located on the Z-axis assembly. Its primary function is to establish a precise and repeatable zero point for the build plate. When a print job is initiated or when the printer performs an auto-homing sequence, the build plate descends until it triggers this switch. This physical contact sends a signal to the printer's mainboard, telling it, "This is the home position." From this established reference point, all subsequent vertical movements are calculated, ensuring each layer is deposited at the exact correct height.
A properly functioning limit switch is the bedrock of print bed leveling. An inaccurate or failed switch leads directly to a host of frustrating print failures. The most common symptom is inconsistent first layer adhesion. If the switch triggers too early, the build plate stops higher than it should, resulting in the first layer being squished insufficiently onto the FEP film of the vat. This often causes the print to detach and fail early in the process. Conversely, if the switch is misaligned or faulty and triggers too late, the build plate may drive down too far, creating excessive suction forces, potentially damaging the FEP, the LCD screen, or the model itself, and making the print extremely difficult to remove. Other signs of a problematic limit switch include the printer failing to complete the auto-homing process, displaying Z-axis errors, or producing layers that are visibly misaligned from the very start of the print.
Regular maintenance can prevent most switch-related issues. It's good practice to occasionally inspect the switch for any accumulated resin, dust, or debris that could obstruct its tiny mechanical arm. A gentle wipe with isopropyl alcohol on a cotton swab can clean the area. More importantly, ensure the switch's mounting is secure and that its actuation arm can move freely without binding. The physical "click" should be audible and crisp when manually pressed. During the bed leveling procedure, the importance of the limit switch becomes perfectly clear. After the switch is triggered during auto-home, the printer uses that position as the baseline for the manual leveling process with the piece of paper. Any inconsistency in the switch's triggering point will carry over into your leveling, making it impossible to achieve a truly level build surface across multiple sessions.
Should you encounter persistent Z-axis errors or homing failures, troubleshooting the limit switch is a logical first step. Before considering replacement, perform a visual and functional check. Listen for the click during homing. You can also carefully observe if the switch's lever is being fully depressed by the build plate's descending arm. In some cases, the issue might be a loose connection. Powering off the printer and checking the wire connector where it plugs into the mainboard can resolve intermittent problems. If the switch itself is confirmed to be faulty—showing no physical click, signs of damage, or consistent failure to register—replacement is necessary. Fortunately, limit switches are standard, inexpensive components. When sourcing a replacement, ensure it is a compatible mechanical end-stop switch. The installation process typically involves removing a few screws, unplugging the old switch, and fitting the new one in the exact same position, taking care to reconnect the wires correctly.
Optimizing your Elegoo Mars 3's performance is deeply connected to this humble component. Beyond basic functionality, a reliable limit switch contributes to longer-term printer health. It prevents the stepper motor from straining against a mechanical end, protects the LCD screen from impact damage during erroneous homing, and ensures every print begins on a perfectly calibrated foundation. For users pushing the boundaries with detailed miniatures or engineering prototypes, this calibration accuracy translates directly to dimensional precision and fine feature resolution. By respecting and maintaining the limit switch, you invest in the reliability and longevity of your entire 3D printing setup. It transforms from an anonymous piece of hardware into a key guardian of your print quality, ensuring that your Elegoo Mars 3 operates not just as a tool, but as a dependable partner in bringing your digital designs into physical reality with unwavering consistency.