check

check

check

check
check
check
check
check

check

check
Integrating a micro switch with an Arduino opens up a world of possibilities for DIY enthusiasts, hobbyists, and engineers. A micro switch, also known as a snap-action switch, is a compact, durable component that triggers with minimal physical force, making it ideal for detection, control, and safety applications. When paired with an Arduino microcontroller, it becomes a powerful tool for creating interactive projects, from simple buttons to complex automation systems. This guide walks you through the essentials of connecting and programming a micro switch with Arduino, ensuring you can harness its potential effectively.
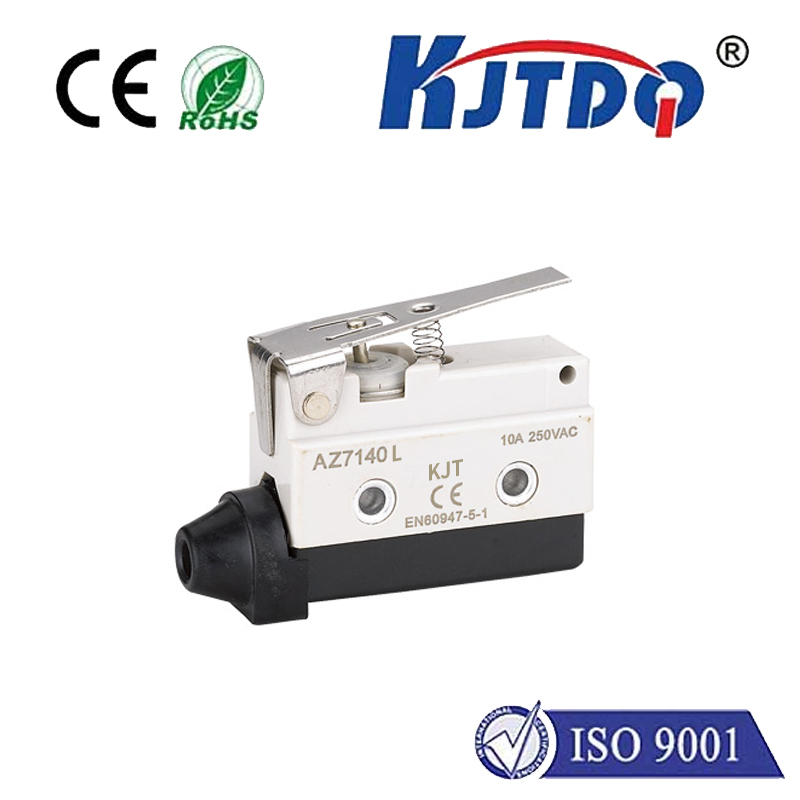
First, understand the basic components. A typical micro switch has three terminals: common (COM), normally open (NO), and normally closed (NC). In its resting state, the COM is connected to NC; when pressed, it switches to NO. For most Arduino projects, you’ll use the COM and NO terminals to detect a press. To get started, you’ll need an Arduino board (like Uno or Nano), a micro switch, a 10k ohm resistor, and jumper wires. The resistor acts as a pull-down to ensure stable readings by preventing floating signals.
Wiring is straightforward. Connect the micro switch’s COM terminal to the 5V pin on the Arduino. Attach the NO terminal to one leg of the 10k ohm resistor, and connect the other leg of the resistor to ground (GND). Then, link the junction between the NO terminal and the resistor to a digital pin on the Arduino, such as pin 2. This setup creates a voltage divider: when the switch is unpressed, the pin reads LOW (grounded via the resistor); when pressed, it reads HIGH (connected to 5V). This configuration avoids erratic readings and ensures reliable input detection.
Next, dive into the code. Open the Arduino IDE and write a simple sketch to read the switch state. Start by defining the pin and a variable to store the state. In the setup function, initialize the pin as an input and begin serial communication for monitoring. In the loop, use digitalRead() to check the pin. If the reading is HIGH, the switch is pressed; if LOW, it’s released. You can add conditional statements to trigger actions, like turning on an LED or sending a message. For example, connect an LED to pin 13 and light it up when the switch is pressed. This basic program forms the foundation for more advanced applications.
Debouncing is crucial for accurate performance. Micro switches can produce multiple rapid signals (bounce) when pressed or released, leading to false triggers. Implement software debouncing by adding a delay or using millis() for timing. A simple method is to wait 50 milliseconds after a state change before reading again, ensuring stable input. Alternatively, use libraries like Bounce2 for efficient debouncing. This step enhances reliability, especially in time-sensitive projects like counters or game controllers.
Practical applications abound. Use a micro switch with Arduino for home automation, such as detecting door openings to trigger alarms or lights. In robotics, it can serve as a limit switch to prevent motors from overextending. For interactive art, embed it in installations to activate sounds or visuals. You can even build a security system where pressing the switch sends an alert via serial monitor or Wi-Fi. Experiment by combining multiple switches for complex inputs, or integrate with sensors like PIR or ultrasonic for layered functionality.
Troubleshooting common issues ensures success. If the switch isn’t responding, check connections with a multimeter for continuity. Ensure the resistor is properly wired to avoid short circuits. In code, verify pin assignments and debouncing logic. For noisy environments, add a capacitor across the switch terminals to filter interference. Remember, micro switches are rated for specific voltages and currents—exceeding these can damage components. Always consult datasheets for specifications like actuation force and lifespan.
In summary, combining a micro switch with Arduino is a versatile and accessible way to add physical input to your projects. With minimal hardware and code, you can create responsive systems that bridge the digital and physical worlds. Start with simple setups, then expand to innovative ideas, leveraging online communities for inspiration. Whether you’re a beginner or a seasoned maker, this integration offers endless opportunities for creativity and problem-solving.