raspberry pi proximity sensor
- time:2025-06-14 02:54:59
- Click:0
Raspberry Pi Proximity Sensor: Adding Awareness to Your DIY Projects
Imagine a museum exhibit that springs to life as you approach, a smart mirror that wakes when you look at it, or a security light triggered only by nearby movement. This magic of responsive environments often relies on a simple yet powerful concept: proximity sensing. When paired with the versatility of a Raspberry Pi, proximity sensors become foundational tools for countless intelligent and interactive projects. This guide demarks how to integrate and utilize proximity sensors with your Raspberry Pi effectively.
Understanding Proximity Sensors: The Raspberry Pi’s “Sixth Sense”
At their core, proximity sensors detect the presence or absence of an object within a certain range without physical contact. They output a signal the Raspberry Pi can interpret, effectively giving your small computer the ability to “sense” its surroundings. Several sensor types are popular with Raspberry Pi enthusiasts:
- Ultrasonic Sensors (e.g., HC-SR04): These sensors emit high-frequency sound waves and measure the time it takes for the echo to return. Calculating distance is straightforward:
Distance = (Time taken for echo × Speed of sound) / 2. They are excellent for detecting objects at distances from centimeters up to a few meters and work reasonably well with most materials. Their simplicity and cost-effectiveness make them a staple in Raspberry Pi robotics and automation.
- Infrared (IR) Proximity Sensors: These operate by emitting an IR beam and detecting its reflection. Some, like simple obstacle detectors, provide a basic digital signal (object near/object not near). Others, like time-of-flight (ToF) sensors (e.g., VL53L0X), can provide highly accurate distance measurements using the time taken for IR light to bounce back. IR sensors are often smaller and can be very precise at shorter ranges.
- Capacitive Sensors: These detect changes in an electrical field caused by a nearby conductive object (like a human hand). They are commonly used in touch-sensitive interfaces but can be configured for proximity detection. Integrating them with a Raspberry Pi typically requires slightly more circuitry than ultrasonic or simple IR sensors.
Why Combine Proximity Sensors with Raspberry Pi?

The Raspberry Pi acts as the perfect brain for proximity sensing projects. It’s more than just reading a sensor signal; it enables:
- Complex Logic: Go beyond simple triggering. Program sequences like “if object detected for 5 seconds, then activate Device A and send an email notification.”
- Data Logging: Record proximity events over time (e.g., foot traffic patterns, object approach times).
- Integration: Combine proximity data with other sensors (cameras, microphones, temperature) or control outputs (lights, motors, displays, speakers).
- Networking: Send proximity alerts or data over Wi-Fi or Ethernet to other devices or the cloud.
- User Interface: Build custom dashboards to display proximity information.
Key Ingredients & Basic Setup
Getting started is relatively straightforward. You’ll need:
- Raspberry Pi: Any model with GPIO pins (even a Pi Zero is sufficient).
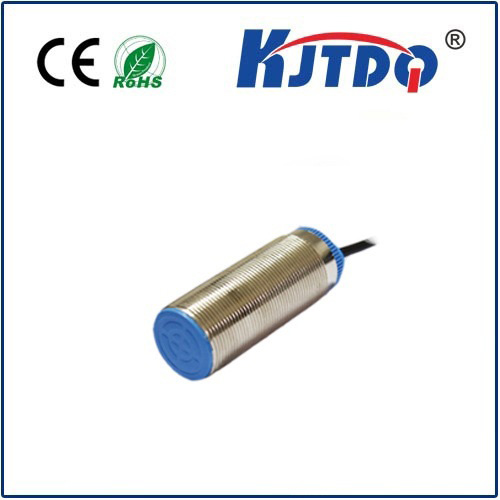
- Proximity Sensor: Choose based on your range, accuracy, and budget needs (HC-SR04 is a great beginner option).
- Breadboard & Jumper Wires: For prototyping connections.
- Resistors (Possibly): Some sensors (like the HC-SR04) or connection methods might require pull-up/pull-down resistors. Always consult your sensor’s datasheet.
- Python: The most common language for interacting with Raspberry Pi sensors. Essential libraries include
RPi.GPIO (built-in) and often sensor-specific libraries (like gpiozero which simplifies common tasks).
Connecting an HC-SR04 to Raspberry Pi (Example)
This is a classic setup. The HC-SR04 typically has four pins: VCC (5V Power), Trig (Trigger), Echo (Echo), and GND (Ground).
- Power: Connect VCC to a Raspberry Pi 5V pin. Connect GND to a Pi GND pin.
- Trigger: Connect the Trig pin to a chosen GPIO output pin (e.g., GPIO 23).
- Echo: Connect the Echo pin to a chosen GPIO input pin (e.g., GPIO 24). A voltage divider (e.g., 330Ω & 470Ω resistors) is highly recommended between Echo and the Pi to reduce the 5V Echo signal to a Pi-safe 3.3V.
- Software: Write a Python script using the
RPi.GPIO library to:
- Send a short high pulse (e.g., 10μs) to the Trig pin to initiate measurement.
- Measure the duration the Echo pin stays high.
- Calculate the distance:
import RPi.GPIO as GPIO
import time
# Define GPIO pins
TRIG = 23
ECHO = 24
GPIO.setmode(GPIO.BCM)
GPIO.setup(TRIG, GPIO.OUT)
GPIO.setup(ECHO, GPIO.IN)
try:
while True:
# Send trigger pulse
GPIO.output(TRIG, True)
time.sleep(0.00001)  # 10 microseconds
GPIO.output(TRIG, False)
# Wait for echo to go high, then start timer
while GPIO.input(ECHO) == 0:
pulse_start = time.time()
# Wait for echo to go low, stop timer
while GPIO.input(ECHO) == 1:
pulse_end = time.time()
# Calculate duration and distance (speed of sound = 34300 cm/s)
pulse_duration = pulse_end - pulse_start
distance = pulse_duration * 34300 / 2  # Divide by 2 for round trip
print(f"Distance: {distance:.2f} cm")
time.sleep(1)  # Short delay between readings
except KeyboardInterrupt:
GPIO.cleanup()
Brainstorming Raspberry Pi Proximity Sensor Applications
The possibilities are nearly endless. Here are some project ideas to spark your creativity:
- Automated Lighting/Display Control: Use a proximity sensor to turn on under-cabinet lights when hands approach the kitchen counter, or activate an information display when someone stands in front of it. Significant energy savings potential.
- Interactive Art Installations: Create exhibits that react to viewer presence or movement – changing lights, playing sounds, or triggering animations. Proximity sensing adds dynamism and interactivity.
- Smart Security: Detect unauthorized approach near doors, windows, or valuables. Combine proximity detection with camera activation (e.g., using the Raspberry Pi Camera Module) for recording or sending alerts. Use multiple sensors for zone monitoring.
- Robotics & Obstacle Avoidance: Essential for autonomous robots or vehicles. Ultrasonic sensors on the front help a Raspberry Pi-powered rover navigate around furniture. Combine with motor drivers for responsive movement.
- Touchless Controls: Use capacitive or close-range IR sensors to create intuitive, hygienic interfaces – control music playback, slideshows, or smart home devices with a simple wave. Particularly relevant in public spaces.
- Parking Assistant: Mount an ultrasonic sensor on a garage wall to help gauge parking distance, displaying the reading on a small screen. GPIO pins make connecting displays straightforward.