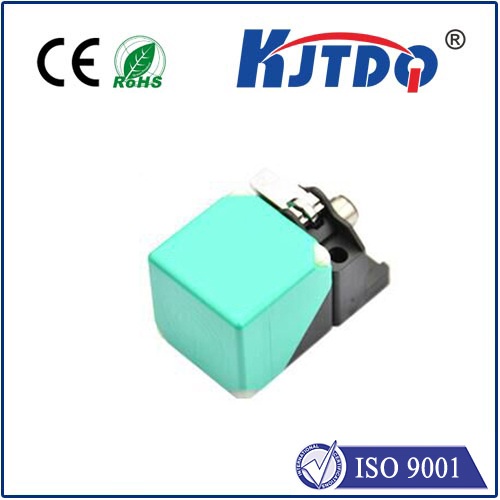
npn no proximity sensor
- time:2025-06-21 00:09:07
- Click:0
When Your NPN Proximity Sensor Doesn’t Detect: Key Troubleshooting Steps
That critical piece of automation grinds to a halt. A conveyor stops moving, a robotic arm hesitates, or a counter misses a beat. The culprit? An NPN proximity sensor stubbornly refusing to acknowledge an object right in front of it – a classic “npn no proximity sensor” scenario. This silent failure can bring productivity to its knees, leading to costly downtime and frustration. Understanding why your NPN sensor isn’t detecting is the first step towards a swift resolution. This guide dives into the most common causes and practical solutions to get your sensor back online.
Understanding the NPN Proximity Sensor: The Basics

Before troubleshooting, let’s quickly revisit how a standard 3-wire DC NPN proximity sensor operates. Unlike its PNP counterpart that sources positive voltage to the load, an NPN sensor acts as a switch sinking current to ground (0V DC).
- Wiring:
- Brown Wire: Connected to the positive DC supply voltage (e.g., +24V DC).
- Blue Wire: Connected to the negative DC supply voltage / ground (0V DC).
- Black Wire: The output signal wire. When the sensor is inactive (no target detected), this output is effectively ‘floating’. When active (target detected), the NPN transistor inside the sensor turns ON, connecting the black wire internally to the blue wire (ground/0V). This sinks current to ground.
- Operation (Simplified):
- No Target: No internal connection between Black (output) and Blue (ground). The output state is ‘OFF’ or ‘open’.
- Target Detected: Internal NPN transistor turns ON, creating a low-resistance path from Black (output) to Blue (ground). The output state is ‘ON’ or ‘closed’ (to ground). Current flows from the load through the black wire into the sensor and out the blue wire to ground.
The Core Problem: Why is There “No Detection”?
When an NPN sensor fails to detect a valid target within its specified sensing range, it usually means the internal NPN transistor is not switching ON when it should. The output remains in the ‘OFF’ (open) state. Let’s systematically explore the reasons:
- Power Supply & Wiring Issues:
- Incorrect or Missing Supply Voltage: Verify voltage at the sensor’s brown (+) and blue (-) terminals with a multimeter. Is it the correct voltage (e.g., 10-30V DC)? Is it stable? Loose connections or broken wires are common culprits.
- Reverse Polarity: Accidentally connecting brown to negative and blue to positive is a frequent installation error. Most DC sensors have reverse polarity protection, but they simply won’t function until wired correctly. Double-check!
- Output Wiring Problem: For the sensor to complete the circuit when active, the load (e.g., PLC input, relay coil) must be connected between the positive supply (+V) and the sensor’s black output wire. If the load is incorrectly wired (e.g., between black and ground), the sensor cannot sink current properly. Confirm the load wiring configuration matches the “Sinking” (NPN) input requirements of your controller.
- Broken or Shorted Wires: Inspect the cable for physical damage, cuts, or crushing. A short between wires (especially brown/black or black/blue) can cause malfunction. Check continuity.
- Sensor Configuration & Setup Errors:
- Sensing Distance Exceeded: Ensure the target is passing within the sensor’s specified nominal sensing range (Sn). Objects too far away won’t be detected reliably. Metal thickness and type also influence effective range.
- Incompatible Target Material: Inductive sensors detect ferrous metals best. Non-ferrous metals (aluminum, brass, copper) have a significantly reduced sensing range. Capacitive sensors might be needed for non-metals. Check sensor specifications.
- Misalignment: The sensor face must be perpendicular to the target’s approach path and correctly positioned relative to the target’s surface. Angular misalignment or mounting too far off-center reduces range.
- Dirty or Obstructed Face: Accumulation of metal shavings, dirt, oil, or paint on the active sensing face can dramatically reduce sensitivity or block detection entirely. A clean sensor face is critical for reliable operation.
- Environmental & Physical Factors:
- Electrical Noise: Strong electromagnetic fields from motors, welders, or high-current cables can interfere with sensor electronics or output signals. Ensure proper shielding, use twisted-pair cables, and separate sensor wiring from power lines. Ferrite cores on cables near the sensor can help.
- Voltage Spikes/Surges: Transients on the power lines can damage sensor electronics. Consider adding surge suppression devices.
- Temperature Extremes: Verify the operating ambient temperature is within the sensor’s specified range. Excessive heat or cold can impair performance.
- Physical Damage: Impact, excessive vibration, or moisture ingress (beyond the sensor’s IP rating) can damage internal components. Inspect for cracks, dents, or condensation inside the housing.
- Sensor or Load Failure:
- Internal Sensor Failure: Like any electronic component, sensors can fail due to age, manufacturing defects, or severe overload/short-circuit events.
- Load Issue/Mismatch: Ensure the load (e.g., PLC input impedance) is compatible with the sensor’s specifications (max. current, leakage current). If the load impedance is too high (current draw too low), the sensor might not ‘see’ the load effectively when it tries to sink current. If the load itself is faulty or open-circuit, the sensor’s output action might be correct, but no effect is observable. Test the sensor independently if possible (see below).
Troubleshooting Methodology: Finding the Culprit
Follow a logical approach:
- Observe & Replicate: When exactly does the failure occur? With all targets? Specific targets? Consistently or intermittently? Try to reliably replicate the issue.
- Verify Basics: Double-check wiring against the sensor’s datasheet diagram for NPN configuration. Confirm power supply voltage and polarity at the sensor terminals.
- Check Sensor Output State: Use a multimeter set to DC voltage.
- Measure voltage between Black (Output) and Blue (Ground).
- No Target: Should read close to the supply voltage (e.g., ~24V) because the output is floating/open.
- Target Present: Should read close to 0V (indicating the sensor is sinking correctly to ground).
- If you see voltage dropping only partially (e.g., to 12V) when a target is present, it often indicates an incorrect load connection or insufficient load current.
- Isolate the Sensor: Temporarily disconnect the load from the sensor’s black wire. Connect a test load directly between Brown (+) and Black (Output). A small indicator lamp (rated for your supply voltage) or a multimeter in current mode is ideal.
- No Target: Lamp OFF or very low current flow.
- Target Present: Lamp should turn ON brightly (or current meter shows significant flow). If the test load works reliably, the issue is likely with your original load or its wiring/configuration. If the test load doesn’t work correctly, the problem lies with the sensor, its power supply, or its setup/en