simbol sensor proximity
- time:2025-06-27 03:09:12
- Click:0
Demystifying the Proximity Sensor Symbol: Your Key to Reading Electrical Schematics
Imagine this: You’re troubleshooting a malfunctioning machine, staring at a complex electrical schematic. Among the maze of lines and components, you spot a small symbol resembling a diamond or a rectangle with converging lines. That is the proximity sensor symbol – a crucial piece of the puzzle for understanding modern automated systems. Knowing how to interpret this proximity sensor symbol is fundamental for anyone involved in electrical design, maintenance, or automation.
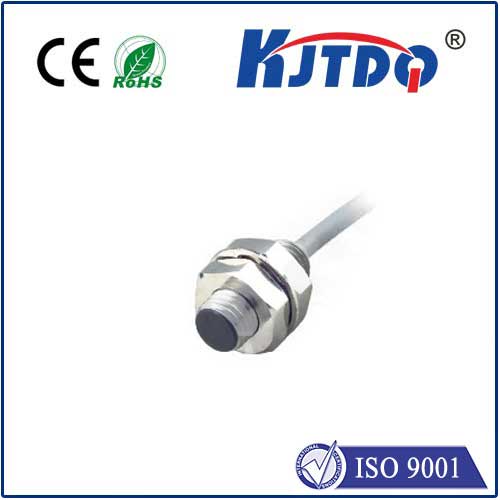
Proximity sensors are the unsung heroes of industrial automation and countless electronic devices. They detect the presence or absence of an object without physical contact, using magnetic fields, capacitance, ultrasonic waves, or light. This non-contact detection makes them incredibly reliable, wear-resistant, and suitable for harsh environments. But how do you represent this sophisticated functionality simply on a drawing? That’s where the standardized proximity sensor symbol comes into play.
Decoding the Standard Symbols
Globally recognized standards like IEC 60617 (International Electrotechnical Commission) and ANSI/IEEE Std 315 define the symbols used in electrical diagrams. While variations exist, especially between different sensor technologies, the core representation for a general proximity sensor typically follows these conventions:

- Common Shapes:
- Diamond: This is the most prevalent symbol for a proximity sensor, particularly inductive types. Think of it as the catch-all symbol representing the core function of non-contact detection.
- Rectangle with Converging Lines: This symbol often represents capacitive proximity sensors. The converging lines evoke the electric field used for detection.
- Circle: Less common for general proximity sensors, but sometimes used, particularly in older schematics.
- The Critical Element: The Sensing Field Indicator
Regardless of the chosen shape, the defining feature of the proximity sensor symbol is a set of two parallel lines emanating from one side of the shape. These lines represent the sensor’s active sensing field. This instantly communicates the sensor’s non-contact nature and its directionality – detection occurs in the direction the lines point.
Important Symbol Variations & Enhancements
While the core symbol tells you it’s a proximity sensor looking in a certain direction, further details refine its meaning:
- Technology Specific Symbols: Some schematics use slightly modified symbols to hint at the technology:
- Inductive Sensor (Detecting Metal): Usually retains the diamond shape. Sometimes shown with a small coil icon inside or nearby.
- Capacitive Sensor (Detecting Various Materials): Often uses the rectangle with converging lines shape.
- Ultrasonic Sensor: Might incorporate wavy lines (representing sound waves) near the sensing field indicator.
- Photoelectric Sensor: Uses a distinct symbol resembling a diode with arrows for light beams (often emitter and receiver shown separately).
- Normally Open (NO) vs. Normally Closed (NC): Like relays and switches, proximity sensors can have either output configuration. The output switch associated with the sensor symbol will be drawn as:
- Normally Open (NO): Represented by a switch symbol that is open (not touching). It closes when a target is detected.
- Normally Closed (NC): Represented by a switch symbol that is closed (touching). It opens when a target is detected.
- Shielded vs. Unshielded (Inductive Sensors): Shielded sensors have reduced side detection ranges. This might be implied by the positioning near metal (shown on the drawing) or sometimes by a subtle modification to the symbol lines (less common in basic schematics).
- Power Connections: Like any other device in the schematic, the proximity sensor symbol must be connected to a power source (e.g., DC +24V, 0V) and its output signal wire(s). These connections are vital for understanding the circuit’s operation.
Why Understanding the Proximity Sensor Symbol Matters
Mastering the proximity sensor symbol isn’t just an academic exercise; it delivers tangible benefits:
- Faster Troubleshooting: When a machine stops, schematics are your roadmap. Quickly locating and understanding what a proximity sensor should be detecting (
Is it seeing the part? Is its output switching correctly?
) is critical for pinpointing failures – whether it’s the sensor itself, its target, wiring, or something downstream like a PLC input failure.
- Accurate Circuit Design & Modification: Electrical engineers and designers must use and place these symbols correctly within their schematics. Knowing the symbol ensures components are integrated properly into the control logic.
- Effective Maintenance & Installation: Technicians rely on schematics for replacing sensors or modifying equipment. Identifying the correct sensor type and its wiring from the symbol prevents installation errors.
- Improved Communication: The proximity sensor symbol is a universal language. It allows engineers, technicians, operators, and suppliers worldwide to discuss and understand circuits consistently using a common visual vocabulary.
Beyond the Symbol: Context is Key
While recognizing the symbol is essential, truly understanding a proximity sensor’s role requires interpreting it within the context of the entire schematic:
- What is it Monitoring? Look at what object the sensor is positioned near on the drawing (e.g., a cylinder rod end, a part on a conveyor, a door).
- What Triggers it? What object passing through its sensing field causes it to actuate?
- How is it Wired? Trace its output connection. Does it feed directly to a PLC input module? Does it control a relay? Is it part of a safety circuit?
- What is its Function? Is it confirming the presence of a part (
Part Present Sensor
)? Verifying a cylinder is fully extended (Cylinder Extended Sensor
)? Detecting a door closure (Door Closed Sensor
)? Safeguarding an area (Safety Light Curtain Sensor
)?
The proximity sensor symbol, seemingly simple at first glance, packs a wealth of information essential for navigating the complex world of electrical control systems. By learning this universal symbol and its common variations, you unlock the ability to decipher schematics, streamline troubleshooting, enhance design work, and foster clearer communication. Whether you’re designing a new production line, repairing an automated packaging machine, or simply trying to understand how an elevator knows the doors are closed, recognizing that distinctive shape and its characteristic sensing field lines is your passport to understanding. It’s the small key that opens the door to comprehending the where, how, and why of non-contact detection in virtually every piece of modern automated machinery and many everyday devices.