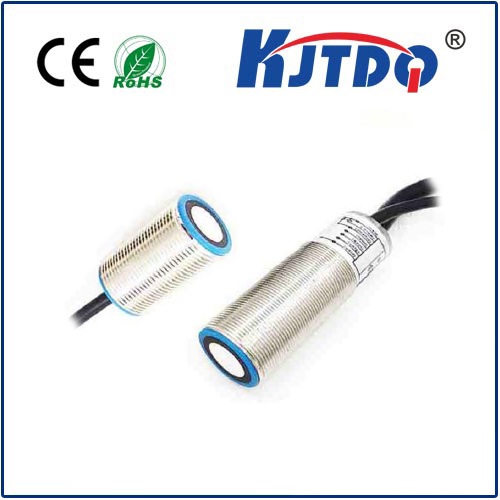
proximity sensor input voltage
- time:2025-06-24 02:58:57
- Click:0
Understanding Proximity Sensor Input Voltage: Powering Your Detection Systems
Proximity sensors are the silent sentinels of modern automation, detecting the presence or absence of objects without physical contact. From smartphones reacting to your ear to complex factory assembly lines counting parts, their role is ubiquitous. Yet, one fundamental aspect underpins their reliable operation: the input voltage. Getting this right is not just a technical detail; it’s critical for sensor performance, longevity, and system stability. This article delves deep into the significance of proximity sensor input voltage, exploring its specifications, implications, and best practices for integration.
The Lifeline: What is Input Voltage?
Simply put, the proximity sensor input voltage is the electrical potential difference supplied to the sensor’s power terminals, enabling it to function. It provides the energy necessary for the sensor’s internal circuitry to generate the sensing field (whether inductive, capacitive, photoelectric, etc.), process the signal change induced by a target, and produce the corresponding output state (e.g., switching a load on or off).
Decoding the Specifications
Sensor datasheets meticulously detail voltage requirements. Key specifications include:

- Nominal Operating Voltage (Rated Voltage): This is the ideal voltage the sensor is designed to operate at for optimal performance. Common nominal DC voltages include 10-30 V DC, 12 V DC, and 24 V DC. AC sensors typically operate at 20-250 V AC or specific voltages like 120 V AC or 240 V AC.
- Operating Voltage Range: Crucially, this specifies the minimum and maximum voltages between which the sensor will function reliably. For instance, a sensor rated “10-30 V DC” means it requires at least 10V DC to turn on and operate, and no more than 30V DC to avoid damage. Operating within this range is mandatory.
- Voltage Tolerance: Some datasheets might specify tolerance bands (e.g., ±10% of nominal) within the operating range where performance is guaranteed.
- Ripple: Particularly for DC sensors, excessive voltage fluctuation or “ripple” on the supply line can cause erratic behavior. Datasheets often specify the maximum allowable peak-to-peak ripple voltage (e.g., <10% of nominal).
Why Input Voltage Matters Profoundly
Selecting the correct voltage and ensuring a stable supply isn’t optional. The consequences of ignoring it can be severe:
- Under-Voltage (< Min. Operating Voltage):
- Failure to Operate: The sensor simply may not turn on or generate a sensing field.
- Unstable Operation: Intermittent switching, chattering outputs, or reduced sensing distance can occur. The sensor’s output might not reliably reach the required signal level.
- Premature Failure: Constantly operating components below their designed power level can stress internal circuits over time.
- Over-Voltage (> Max. Operating Voltage):
- Catastrophic Failure: This is the most immediate and severe risk. Applying voltage significantly beyond the maximum rating will damage internal components (like the output transistor or oscillator circuit), often irreparably. Over-voltage is a primary cause of sensor burnout.
- Output Malfunction: Even before complete failure, the output signal may become stuck (always on or always off) or behave erratically.
- Safety Hazard: In extreme cases, over-voltage can lead to overheating, smoking, or even fire risk.
- Fluctuating or Unstable Voltage: Even if within the nominal range, excessive noise or rapid fluctuations can cause:
- False Triggering: The sensor may switch outputs without a valid target present.
- Reduced Sensing Distance: Performance degrades as the supply voltage dips towards the lower operational limit.
- Output Signal Noise: This can confuse downstream controllers (PLCs, relays).
Selecting the Right Voltage
Choosing the appropriate input voltage depends on your system’s power infrastructure:
- Industrial Control Panels (PLCs): 24 V DC is overwhelmingly the de facto standard. It offers good noise immunity, safety advantages over higher voltages, and is readily available from most PLC power supplies.
- Automotive/Mobile Applications: 12 V DC is common due to vehicle batteries. Look for sensors with wide ranges (e.g., 9-30 V DC) to handle cranking voltages and alternator fluctuations.
- Legacy Systems or Direct Line Power: AC-powered sensors (e.g., 120 V AC, 240 V AC) might be used. Exercise extreme caution due to higher safety risks.
Always consult the sensor’s datasheet for its specific input voltage requirements. Never assume compatibility based on plug shape or form factor alone.
Special Considerations: High vs. Low Voltage Sensors
- Low Voltage (e.g., 10-30V DC): Predominant in modern automation. Benefits include ease of integration with controllers, intrinsic safety (lower risk of shock), lower power consumption, and generally simpler wiring. Most solid-state sensors fall into this category.
- Higher Voltage AC Sensors: Primarily found in specific older installations or applications where DC power isn’t readily available. They often have mechanical outputs (like relays) capable of directly switching heavier AC loads. Require careful handling due to shock hazards.
Ensuring Stable Input Voltage: Best Practices
- Use a Regulated Power Supply: This is paramount. Choose a supply specifically rated for the nominal voltage and capable of delivering the required current (including all connected sensors plus a margin). Ensure its output voltage remains stable (< ±% ripple) within your sensor(s) operating range under all load conditions.
- Calculate Total Load: Sum the maximum current draw of all devices connected to the same power supply line. Undersized supplies will drop voltage under load, potentially causing under-voltage issues.
- Consider Line Length and Gauge: Long or thin wires introduce resistance, leading to voltage drop. Use adequately thick conductors, especially for longer runs or higher currents.
- Suppress Noise and Transients: Employ protection measures near inductive loads (motors, solenoids) or in electrically noisy environments:
- Flyback Diodes: Across DC coils for protection against back-EMF.
- Varistors (MOVs): Clamp high-voltage spikes.
- RC Snubbers: Suppress switching transients.
- Isolated Power Supplies: Provide excellent noise immunity.
- Fuse Appropriately: Protect the sensor circuit with a correctly rated fuse at the power source. This helps isolate faults and prevents wiring damage.
The Output Connection
Remember that the sensor’s input voltage powers the entire sensor, but the output circuit (NPN/PNP transistor, relay) uses this supply to switch the load. The switching capability (voltage/current) of the output is separate but inherently limited by the sensor’s input voltage rating. Ensure the load (e.g., PLC input, relay coil, indicator) is compatible with the sensor’s output specifications and the supply voltage.
Understanding and meticulously managing the proximity sensor input voltage is far more than a technical box-ticking exercise. It is foundational to building reliable, safe, and long-lasting detection systems. By respecting the operating voltage range, selecting compatible power sources, and mitigating potential disturbances, you ensure these vital components perform their sensing duties flawlessly, day in and day out. Always prioritize consulting the manufacturer’s datasheet—it is the authoritative guide to powering your specific proximity sensors correctly.